Showing posts with label Beauty. Show all posts

Thursday, 8 June 2017

Kiko Tropic Heat Dewy Stick: Review


With the weather gradually getting warmer, I'm reaching far less for beaming pearlescent highlighters, and going more for a subtle 'glow' with my makeup looks.  In summer I prefer to go more minimal and natural in terms of makeup, and I've recently been trying out this Tropic Heat Dewy Stick from Kiko as an alternative to my MAC Cream Colour Base


This product comes in at £7.90, so fairly affordable, and as with most of the Kiko products I love the simple, ergonomic yet stylish packaging.  The product applies easily, and gives a dewy, almost slightly wet look to the skin depending on how heavily you apply it.  It's completely uncoloured (which I really like) and has no shimmer or glitter to it, which I'm also a big fan of.  

My main qualm with the dewy stick would be that it can shift foundation quite badly if you're not careful with it - you can't be too heavy handed, in spite of the fact that its effect is quite subtle.  It does also feel ever so slightly sticky on the skin... but to be honest this was something I had expected, especially with a main ingredient being beeswax. 


All in all, gives a natural, sunny glow to the skin.  For £7.90, not too bad at all.  What do you guys think?

Ruby x 

Follow

Tuesday, 30 May 2017

Orange-Copper Eye-Catcher


I'm not usually one for makeup trends - but the burnt orange, smoky red or even popping tangerine eyeshadow looks I have seen here there and everywhere recently have really caught my attention.


However, as with all trends, I've also been (only slightly) reluctant to go out and buy a shit load of orange-hued palettes in case come the end of summer everyone's back to more subtle daytime looks.  What I have instead invested in is just a couple of products - this awesome mascara in 'Warm Up' from MAC (a la the wonderful Megan Ellaby), and B.'s vibrant eye shimmer in Copper.  This was only very recently discontinued at Superdrug, as they're re-launching the range, but it's a glossy, creamy eye colour with gold sparkles.      


Combined, they create this gorgeous (yet not too) wild orange eye look.


The thing I love about the B eye shimmers is that they're so easy to use, and also really buildable, so you can use them all over the lid and simply apply more where you want better colour intensity.  I literally threw a load of this onto my eyelids, did a bit of winged liner on top and was good to go - no faffing around with palettes or multiple shades (or even brushes - your index finger is as good as any brush with this kind of product).


But the real eye catcher is the mascara - a nice thick coating of classic black on the top lashes, combined with the awesome bright orange shade from MAC.  


Paired with pretty much any nudey brown lipstick - the one I wore is also from B., in the shade 'Toffee' - this look is a winner, if I do say so myself.  What are your thoughts?

Ruby x 


Follow

Saturday, 29 April 2017

Lips of the Month: Chili


This month I've been a girl of simple appearance.  In between studying, working, eating, studying, sleeping and studying makeup has been the last thing on my mind.  However I recently went for a coffee with a friend who was back in Brighton for a couple of weeks from a year abroad in Alicante, which of course warranted lipstick.  And rediscovered my pure, unadulterated love for Mac's Chili.


 This is a fiery, terracotta-toned red shade that is still beautifully wearable during the day.  In spite of being a matte formula (which I traditionally haven't got on with), this one is not nearly as drying as my ultimate love-hate Mac lipstick, Velvet Teddy.  I didn't really believe the Sales Advisor when she told me the lipsticks vary slightly in mattifiying effect from shade to shade - but she was right!


The colour is rich and long lasting, and perfect for any other green-eyed girls (monsters?) out there.  Maybe I'll finally become a red lipstick girl - can anyone recommend any other shades?

Ruby x 


Follow

Saturday, 22 April 2017

Nars Eye Paint in Black Valley: Review


And so, my quest for an above average eyeliner continues.  Since the birth of this blog I've grappled with the likes of Smashbox and Stila's offerings, but to little avail.  Smashbox didn't have quite the right amount of pigment, and Stila was not enough bang for your buck (I was going through one every couple of months!), so I decided it was time to try something new...and that something is Nars' Eye Paint in the shade Black Valley.


This is a gel formula liner, which I have tended to have the most luck with over the years - I'm certainly better with a brush than with a pen.  I also think gel liners work out much better value in the end.  This was £19 from Space NK, and by the looks of it will probably last me 2-3 years, as a little goes a long way! 

The colour is pretty much as black as you can go, and dries to a gorgeous deep matte.  The formula is creamy and very movable, making it fairly easy to apply as long as you've got a trusty liner brush to hand.  I haven't yet tried it, but the sales assistant I spoke to about it in the shop also mentioned you can use these paint pots as all over creamy shadows as the colour is quite buildable - however I'm not too sure I'd be using it all over my lid in this shade (unless I was dressing up as a panda, maybe).


My only qualm with this would be the staying power, as always.  I think they need to invent an eyeliner that includes some kind of safe adhesive in its ingredients.  I'm fine for the first few hours, but once those facial oils start to creep through I'm in smudge city.  I've found using an eyelid primer or applying over the top of a powdered lid definitely helps - it's still not fail safe, but it'll do for now. 


Will my quest for eyeliner ever end?  I'll keep you posted...

Ruby x

Follow

Monday, 30 January 2017

January Favourites


Wow, it feels like I haven't done a favourites post in so long... which is in fact, pretty accurate - my last one was in May last year.  Oops.  So we've plenty to catch up on.


The first honourable mention must be YSL's Mon Paris, which is a classic, romantic, and suitably Parisian smelling fragrance.  Think fruity, floral and sweet but with a deeper chypre base - somewhere between Giorgio Armani's Si and Coco Mademoiselle.  Lovely.

For my birthday in October my housemates (aren't they just the best?!) got me an Instax Mini 8 Camera in Yellow, which I have been loving.  There's nothing quite so satisfying as the clunk when you hit the shutter, the little squeal as your picture emerges, and anxiously watching the image develop over a two minute interval.  You can get them in all sorts of colours and there's plenty of funky cases to boot - like this oh-so-70s divine floral one.


I've definitely had to up my haircare game this January.  Whereas I'm usually fairly lazy, having just had another load of bleach inflicted on my ends as well as the colder temperatures, I'm lathering on all the nourishment I can.  I've recently rediscovered Lee Stafford's products, and I have to say, one of the major USPs of his products for me is their amazing smell.  I'm talking sweet, nutty, white-sand tropical island kind of smell.  Just what the doctor ordered in January, no?


I  like to whack a load of this Repair Oil onto my damp ends, and again once my hair has dried, to help seal the ends and give a glossier finish.  Paired with Ojon's Leave-in Glossing Cream, which I again use a generous dollop of on wet, brushed through hair, this combination has just about been saving my hair throughout the month.


And finally, to brighten up my reluctantly wintry looking skin, I've returned to an old favourite by Kiko - their Beam of Light Highlighter in 01 Cream.  Kiko is a brand I so rarely tend to buy from, but I believe I picked this up when I popped into one of their stores in a mall in Spain - as you do.  Anyway, it's just glorious.  Think pearlescent, shimmery, sandy gold colours; again, beaches and tropical islands (anywhere but England!).  This is highly pigmented and gives a gorgeous highlight but can be layered according to desired effect.


I like to dust along cheekbones, brow bones, cupid's bow, you name it.  Just call me shimmerball.

Ruby x


Follow

Monday, 23 January 2017

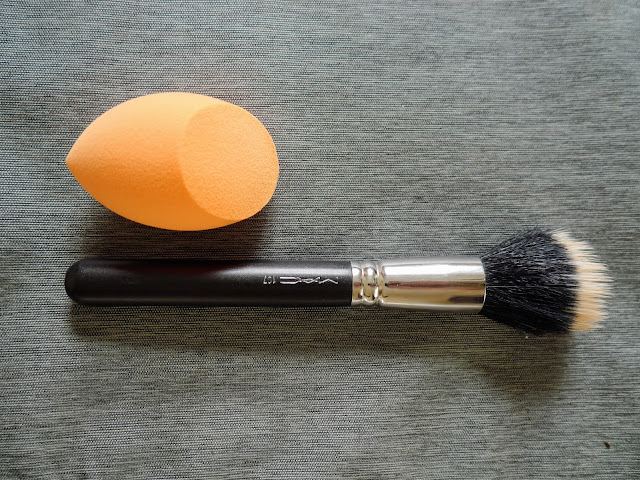
Review: Real Techniques Miracle Complexion Sponge


It was not until the release of the BeautyBlender in 2007 that blending sponges were taken truly seriously within the beauty world.  Over the past 10 years or so, the BeautyBlender concept of a pricier, but high-tech and reusable sponge which forms an integral and versatile part of any makeup routine has been adopted by dozens of other brands within the market.  I first got my hands on the original BeautyBlender sponges back in 2015, and having previously used a stippling brush, I could instantly see why everyone was going crazy for sponges instead.  Although I would still consider myself a relatively faithful member of the original BeautyBlender fan club, the price of those bad boys is not easily overlooked, at around £13 a sponge.  And so, when the time came, I began my search for a new, more affordable blending sponge.  And this is what I found...  

 
Real Techniques have a pretty good reputation with me as it is for affordable but good quality and well designed makeup brushes.  And their take on the blending sponge certainly does not disappoint.  Coming in at just £4.49 on Amazon for one, or £7.49 for two, these are undoubtedly miles better value than the original BeautyBlenders, yet are similar in many ways.  They expand slightly less than the BBs, which I found to grow by at least 40-50%; I would say with RT you're looking at around 25% expansion, making for a slightly denser sponge. 

Before soaking...

After soaking.
   
 But I actually far prefer this - I would find if I didn't rinse the water out my BB properly before using, it would dilute my foundation to only give a very light coverage.  Don't get me wrong, I don't like cakey, but there is also a reason I bother wearing foundation in the first place!  Also, I far prefer the shape of this sponge.  The flat side is perfect for under eyes and across cheeks, while the rounded end is better for nose and eyelids/browbone area.  In terms of effect, this is certainly on par with the BB, giving a similarly subtle, airbrushed but natural look that blends seamlessly with the skin.  Because of its functionality, price point and design, my vote must then go to Real Techniques' sponge over BeautyBlender.  

Has anyone else compared the two? 

Ruby x


Follow

Wednesday, 14 December 2016

Activated Charcoal: The New Teeth Whitening Phenomenon


Good evening strangers.  I hope advent is treating you all splendidly!  I feel like a right failure at the moment - I've been lapping up all the Blogmas and Vlogmas contributions of so many other bloggers and doing... well, one post short of nothing myself.  You guessed it - deadlines are approaching (oh, the cruelty).  

Anyway, I thought I'd drag myself away from my essays for a little while tonight to offer you my two cents on the new teeth whitening craze that appears to be taking the world by storm: activated charcoal.  Little pots of the stuff seem to be popping up left, right and centre wherever I look, but the one I chose was this one from Amazon, by Pro Teeth Whitening Co. (currently out of stock :( ), and came in at a tidy £12.99, certainly representing one of the cheaper options for teeth whitening!

This particular one is 100% natural and made with finely ground food grade activated charcoal, unlike many other whiteners I've been guilty of trying in the past which use peroxide or other chemicals.  Unlike with using Crest Strips for example, I have no teeth sensitivity whatsoever using this which is a Godsend.  Although I got great results using Crest Strips, the sensitivity really was a bitch, to the point that if I breathed in too quickly through my mouth I would get shooting pains in my teeth - nice.  


 Also, perhaps contrary to my initial expectation, this particular one has quite a pleasant, natural and mild flavour which can only really be described as a considerably weak cocktail of mint and ginger beer.  I dampen my toothbrush and dip it straight in to pick up a light coating, then brush my teeth immediately for around a minute.  I do this after brushing my teeth with normal toothpaste first.  The texture is predictably quite gritty at first, but it does lather up slightly to more of a paste consistency as you brush.  

In terms of how it works, I'll leave it to the professionals to explain: 

'Activated charcoal is used today and has been used throughout the centuries to treat people who have accidentally ingested poison - with its porous surface, it attaches to toxins and impurities in the body to draw them out. It works in just the same way on plaque, tannins and stains on teeth - safely and efficiently lifting these off.'


 For my particular brand it recommends using twice a day, which I have been doing fairly routinely for around two weeks now.  And I must say, I feel like slowly but surely, my teeth are looking cleaner and whiter, and I've noticed small surface stains gradually fading.  I did take some fairly atrocious before and after gnasher-shots I was going to share with you all, but having put them side by side I realised the lighting is so horribly inconsistent that it would be better to not share them with anyone, ever, and leave things to the imagination instead.  Has anyone else tried or is thinking of trying a similar product?

Ruby x


Follow

Saturday, 26 November 2016

Budget Brow Saviour: Maybelline Brow Drama


 I don't know if anyone else has been suffering in the wake of Storm Angus with sudden and vicious gusts of wind threatening dignity and composure all in the same breath..?  Brighton has been particularly windy in the past week, which has had me reaching for everything I can to preserve my makeup.  And while there is very little that can prevent my watery eyes, I've rekindled my love for Maybelline's Brow Drama Sculpting Mascara as a fail-safe way to keep those caterpillars in place all day long.    


My first steps involve giving my brows a little brush through using a spoolie brush, then using Mac's 253 to apply my well-loved ABH Dipbrow Pomade, to give them some initial shape and colour (admittedly they could've done with a pluck too - apologies, the approaching uni deadline stress is real)...


And once that's done, it's time for Brow Drama.  


Having tried a few slightly more expensive brow gels by the likes of MAC and Laura Mercier, I have to say, this is equally as good, if not better - I really don't think there could ever be a huge difference between high street and high end brands with regards to this type of product.  It's the perfect brow finisher - sets them in place, adds a tiny tint of colour, and keeps them put all day.  Marvellous!

Ruby x


Follow